
|
Use the mobile app to open a loaner, rental, or test drive agreement from scratch, from a customer record, from an appointment, or from an agreement pending unit assignment or inspection.
How to Open an Agreement on Mobile
The open agreement process is broken up into sections to help smoothly guide you through the steps, from filling in customer information to capturing a signature.
Quick Steps
| 1 |
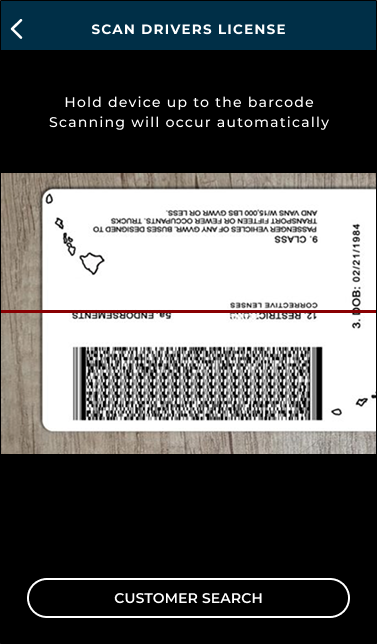
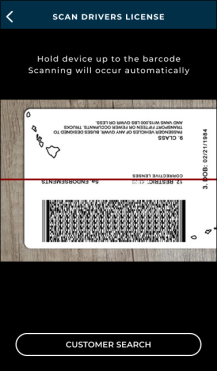
Tap Open, then scan the customer's driver's license or search for their record. |
|
| 2 |
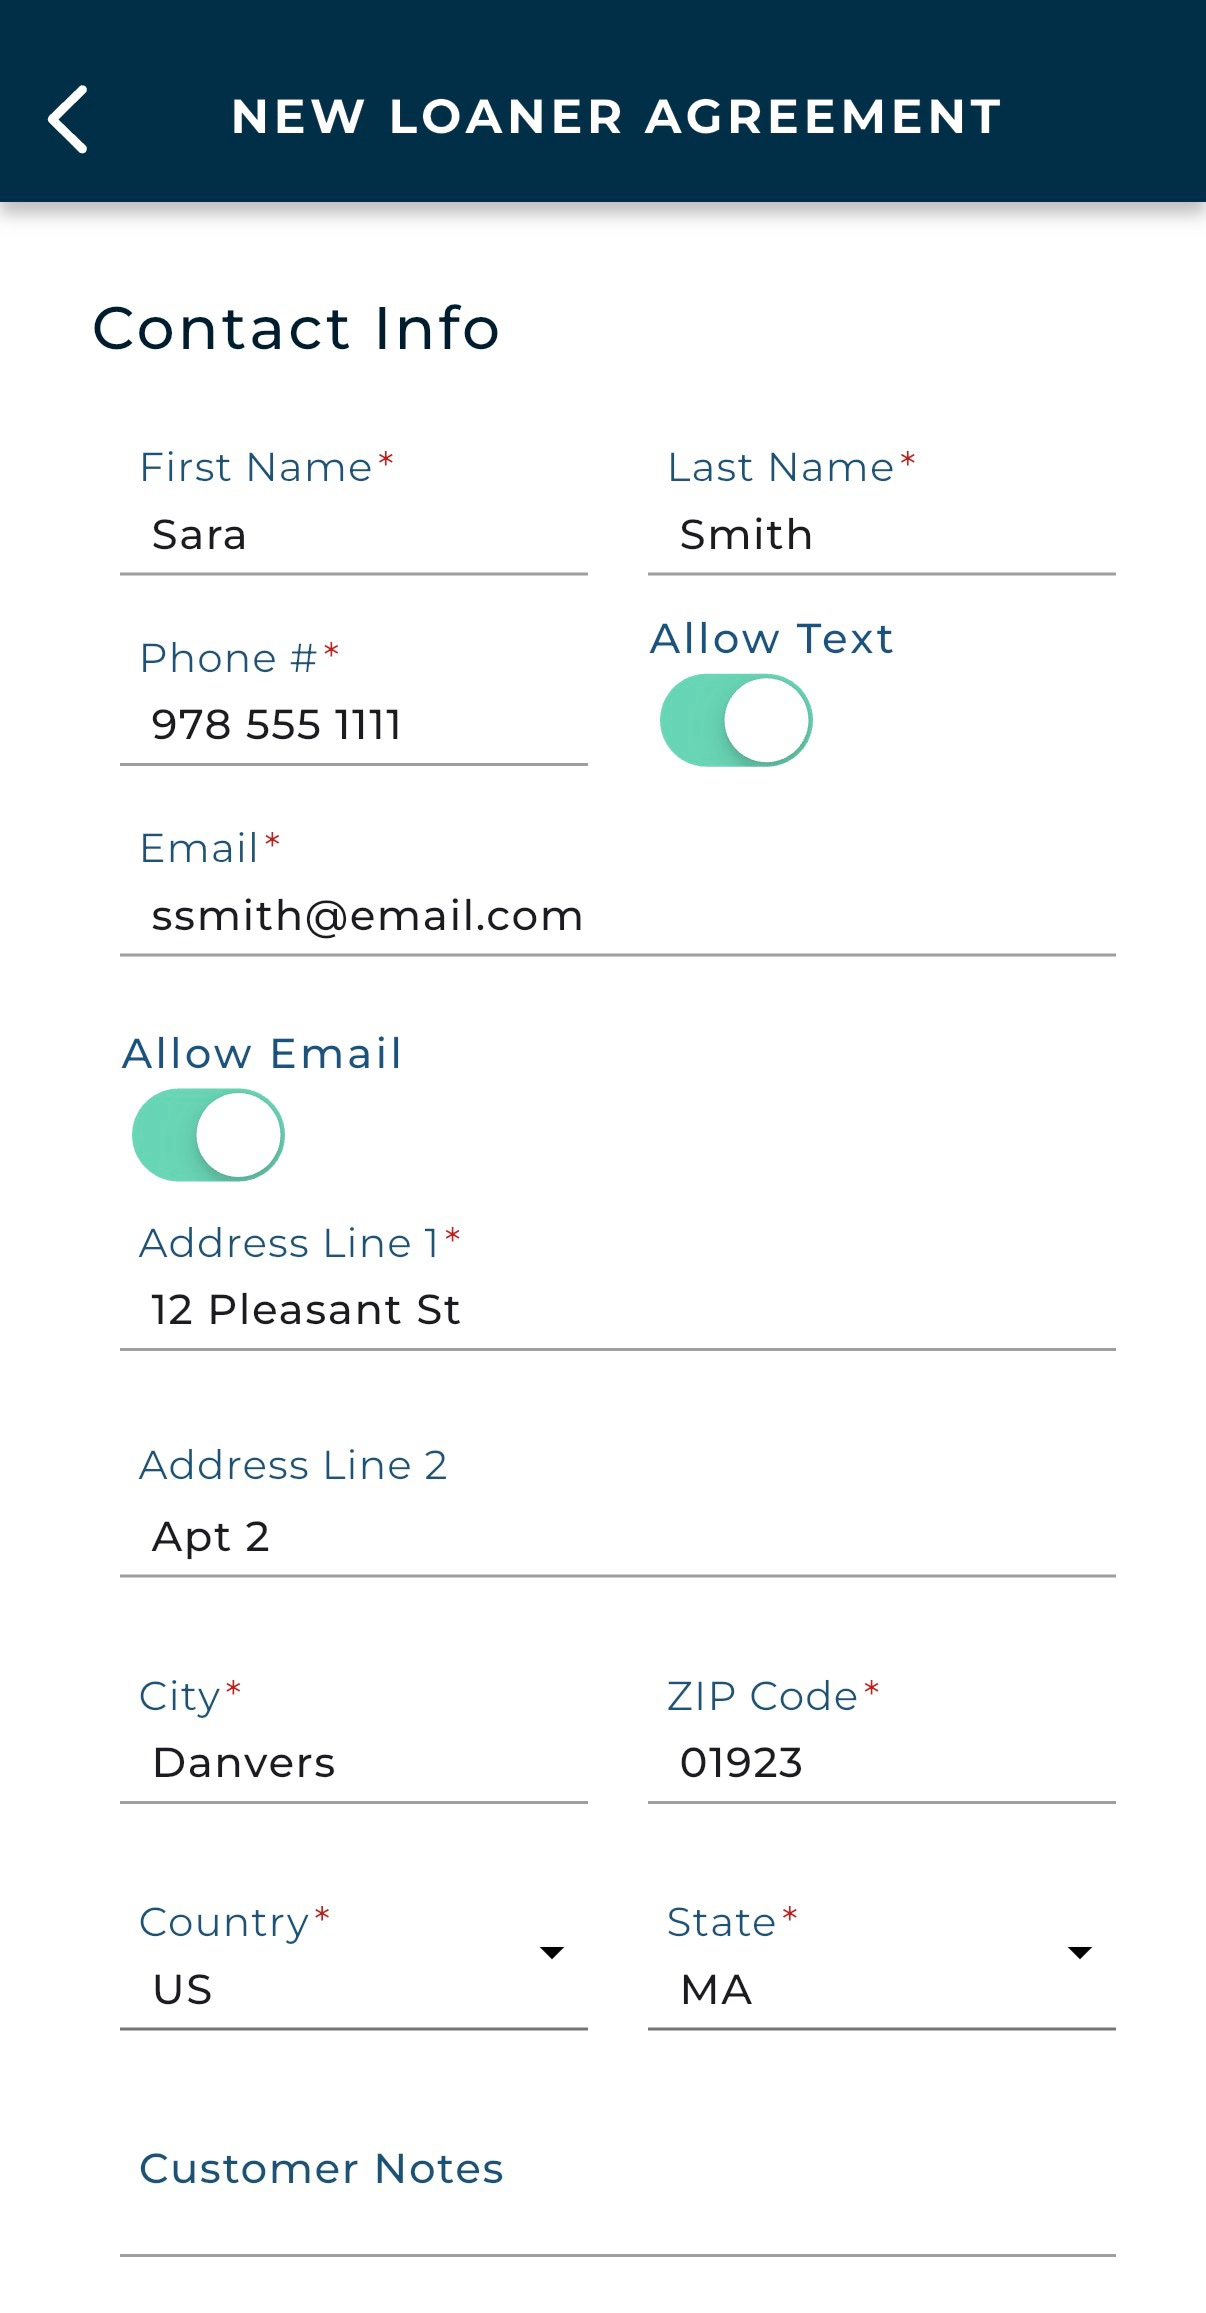
Fill in the Customer Profile (contact info and driver's license) and tap . |
|
| 3 |
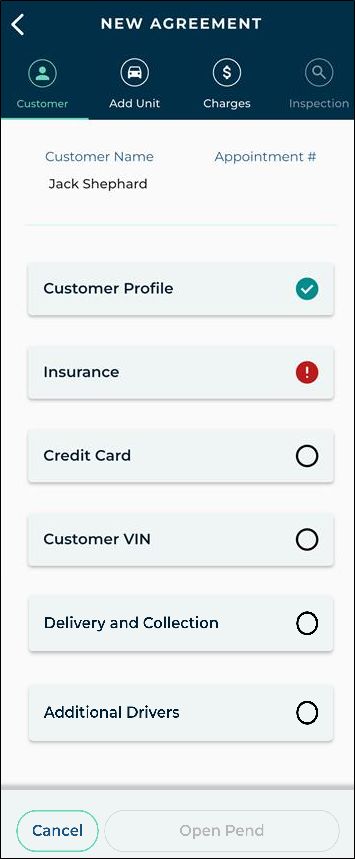
Fill in any other sections that apply: Insurance, Credit Card, Customer VIN, Delivery/Collection, Additional Drivers. |
|
| 4 |
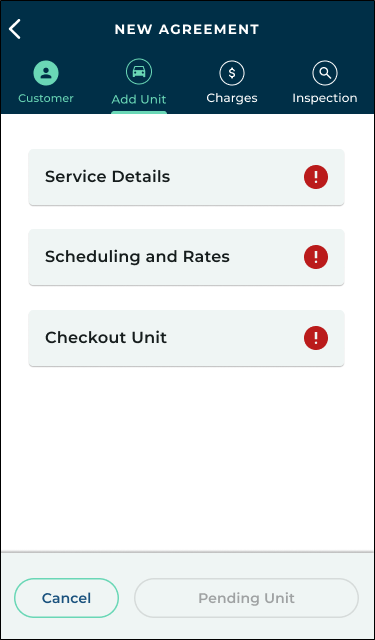
Add a unit, including service details, scheduling, rates, and unit details. |
|
| 5 |
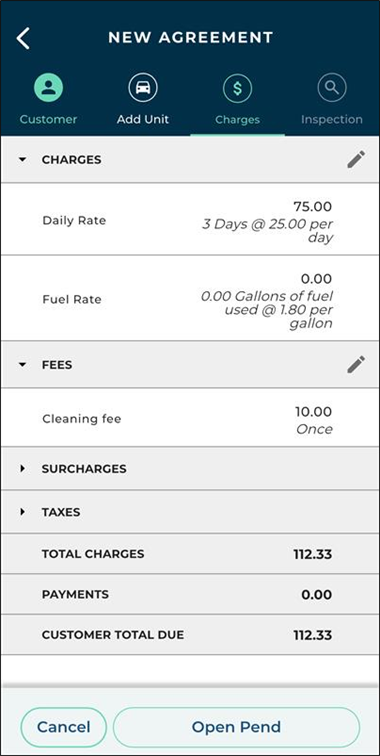
Review charges, fees, and taxes. Tap any line item to edit, if allowed. |
|
| 6 |
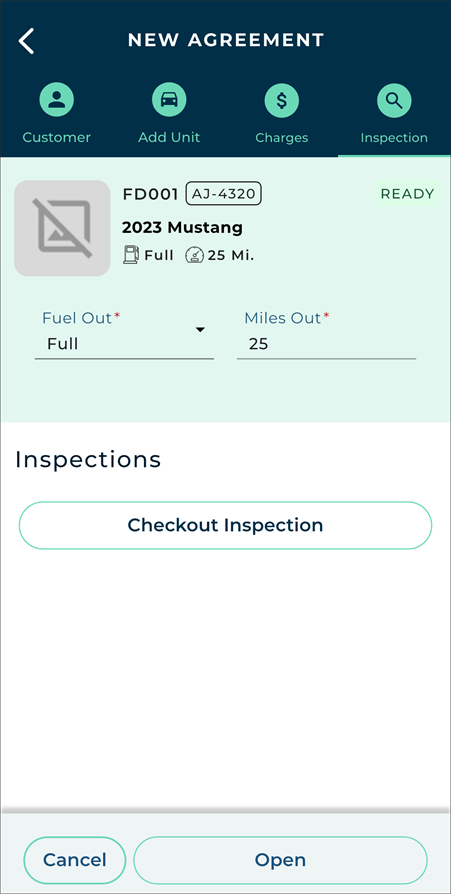
Inspect the unit: photograph each zone and mark any damage. |
|
| 7 |
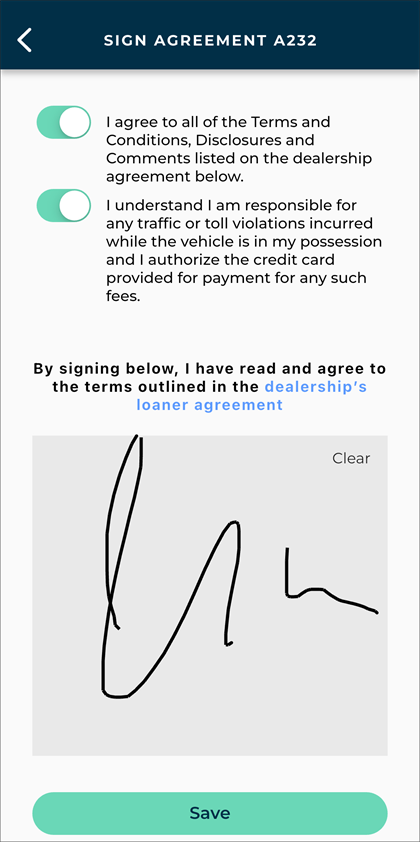
Tap and collect a signature (electronic, print, email, or text). |
|
Full Walkthrough
1. Scan or Search (from the Home Screen)
 Option 1: Scan a Driver's License / Search or Walkup.
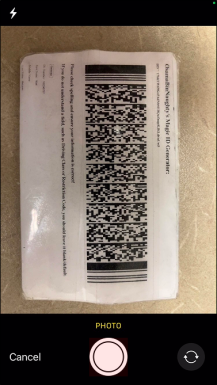
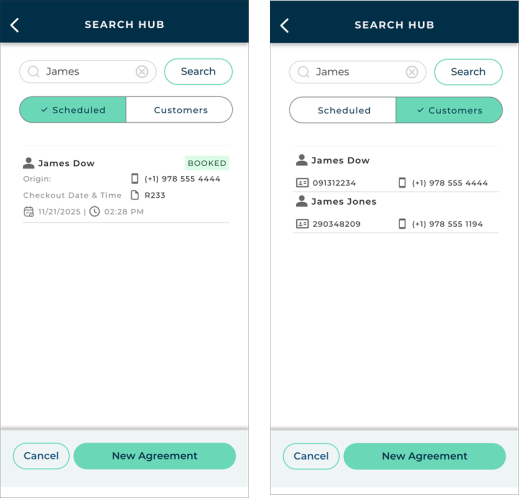
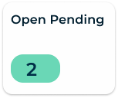
Option 2: Start from an appointment, available unit, or pending agreement (on the Dashboard).
2. Complete Customer Profile Information
After you begin the agreement process, you are brought directly to the Customer Profile section.
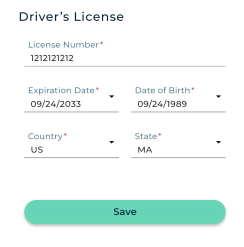
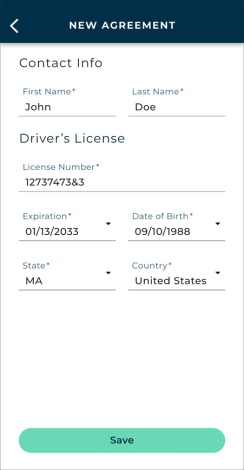
This section consists of customer record information, including contact information (name, phone #, email, address, customer communication language, if applicable, and notes) and driver's license (license number, expiration date, date of birth, country, and state).
When you're finished with this section, tap .
3. Fill in Additional Customer Information
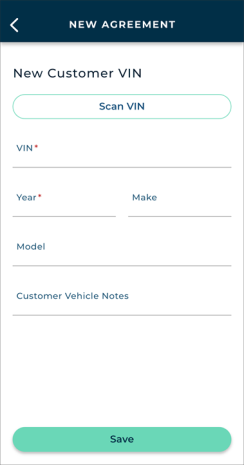
The Customer stepper of the agreement consists of several sections.
A section with required information still needing completion is marked ( ). After you fill in all required fields in a section, it is marked as completed (
 ).
Hover to view the full-sized image.
Customer Profile
 ). If you need to view or change anything, tap the section.
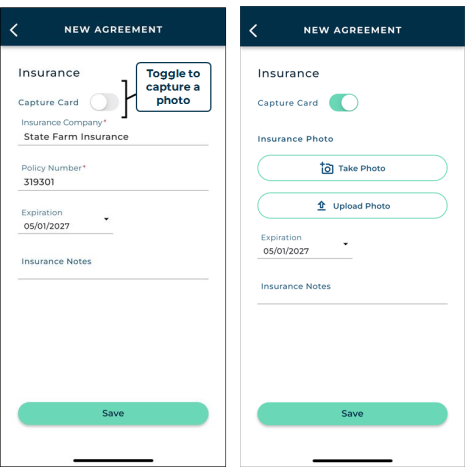
Insurance Information
Credit Card

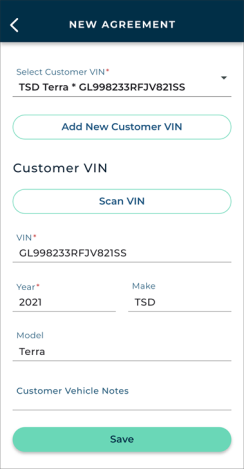
Customer VIN
Delivery and Collection
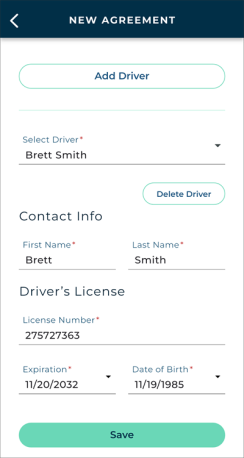
Additional Drivers
4. Add a Unit to the Agreement
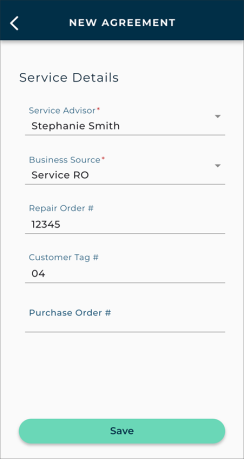
The Add Unit stepper of the agreement consists of several sections.
A section with required information still needing completion is marked (). After you fill in all required fields in a section, it is marked as completed ().
Hover to view the full-sized image.
Service Details
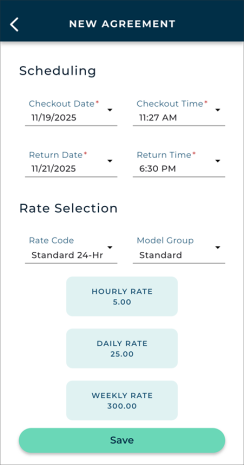
Scheduling and Rates
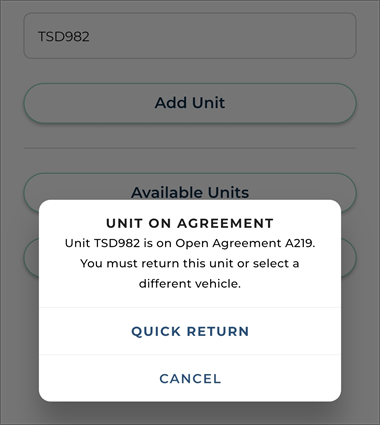
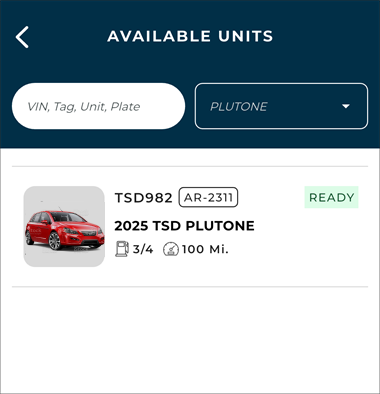
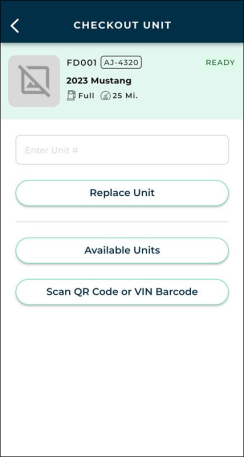
Checkout Unit
5. Review Charges
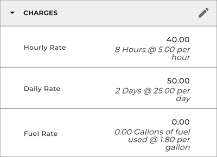
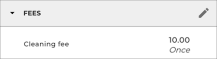
The Charges stepper of the agreement consists a breakdown of charges, fees, surcharges, and taxes, as well as total charges, payments, and the customer total due. Tap to expand any of these line items to view individual charge amounts and make edits, if allowed.
Hover to view the full-sized image.
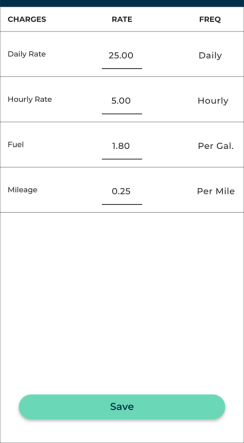
- Edit individual rate, fuel, and mileage charges. Read more:
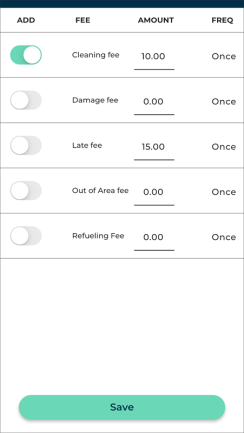
- Edit, add, or remove fees. Read how:
 ).
6. Inspect the Unit
The Inspection stepper of the agreement is where you can record the unit's Fuel Out / Battery Out and Miles Out, and tap to take photos and mark damage, as needed.
Hover to view the full-sized image.
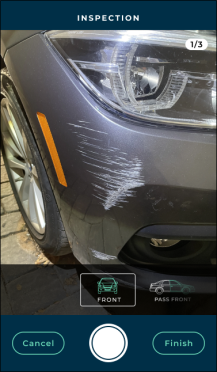
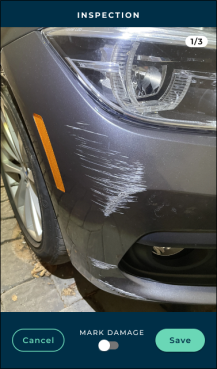

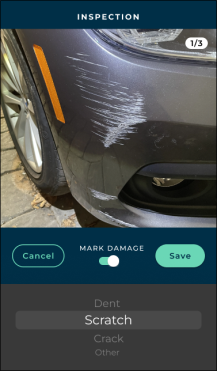
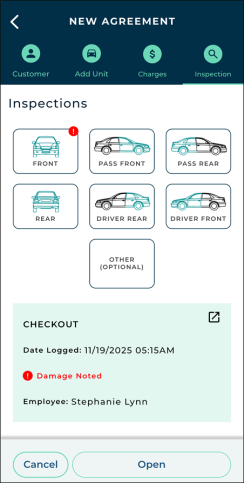
 ) within the summary to review this inspection for each zone. When doing so, you can do the following:
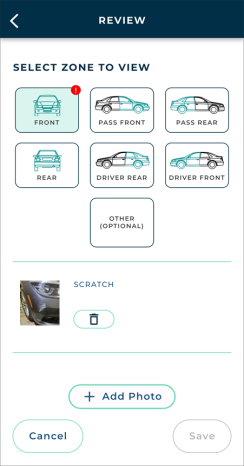
7. Open and Collect a Signature
Tap to complete (save) the open agreement. The app displays a prompt for you to select an agreement form and collect a signature.
- Collect an electronic signature. Tap . Read more:
- Collect a hard copy signature. Tap .
- Collect a contactless signature. Tap and confirm the email address, or and confirm the phone number, then send the agreement form to the customer for a signature.
The agreement is opened! After the signature process is complete, you are returned to the Home screen.
If your location uses automatic texts or emails, a copy of the signed agreement form PDF is texted or emailed to the customer, as long as the customer has opted to receive texts or emails, respectively.
Additional Features & Integrations
Some features may be available on this screen of the mobile app depending on which integrations are connected with your location.
Interested in learning more about any of these integrations? Contact your TSD Sales Representative at sales@tsdweb.com to get started.
Credit Card Processing
Securely collect a customer's credit card and bill for agreement charges (i.e., rates, fuel, mileage, and fees), and/or toll / violation charges, if you have Toll Processing.
Note: If you use Toll Processing integration only (i.e., credit card processing for toll charges only, not for agreement charges), you can only capture a credit card for the purposes of charging for tolls, not agreement charges. See "TSD Toll Connect: Toll Processing" for more information about toll processing.
- Capture a credit card. Capture a credit card so it is on file for future payment (processed only at close). Depending on your provider, you can do so in several ways.
- (Stripe) Capture a card with a supported card reader. Read more:
- Scan a credit card with your mobile device (OCR scanning). Read more:
- Manually fill in credit card information. Read more:
- Bill potential tolls / violations to the captured card. Make sure you've captured a credit card to charge for tolls / violations, and tap Charge Violations to Customer
 . If toggled off, these will be billed to your location. Payments are automatically processed when tolls / violations are incurred.
- Pre-authorize a captured credit card to hold funds.
- Tap Pre-Authorize .
- (Rentals only, if applicable) Edit the pre-auth amount. If you have a Rental pre-authorization set up for Rental agreements and this is at open or editing an open agreement, you can tap to customize the amount of the pre-authorization (anything over $1.00). You'll also find your configured Rental pre-authorization amount defaults displayed for easy reference. If you edit the amount, it will be updated.
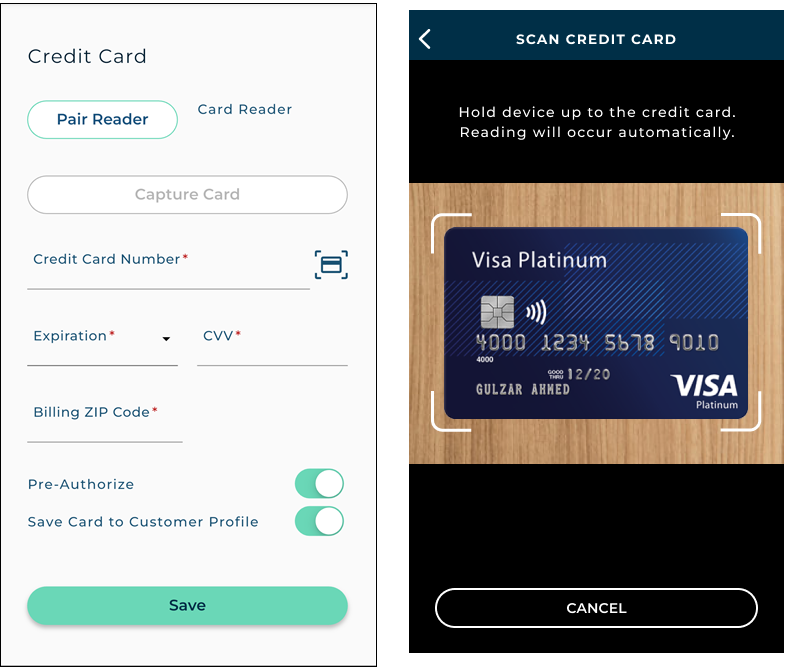
 ) next to the Credit Card Number.
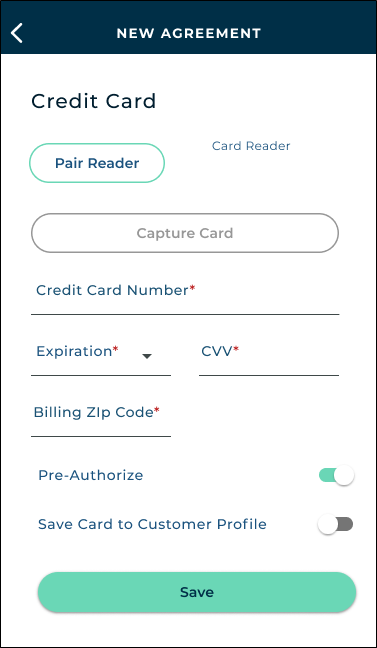
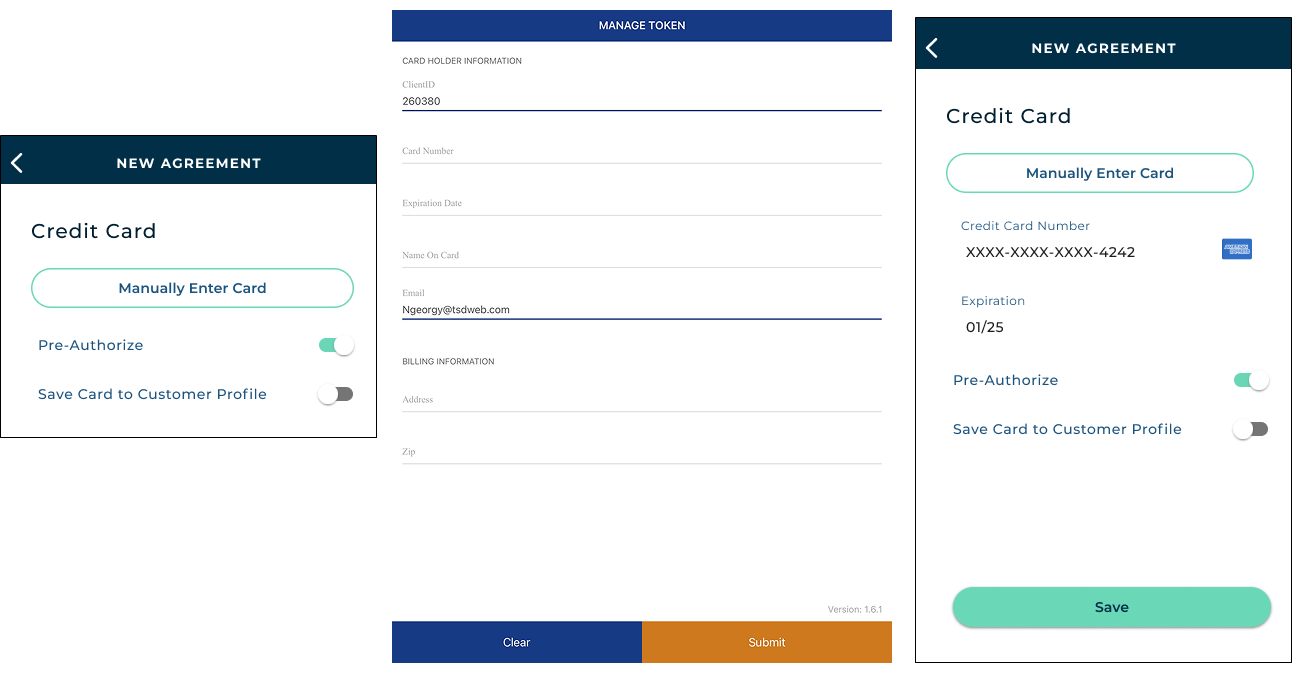
Important Note: When opening a new agreement, the pre-authorization is processed at save. However, if viewing / editing an agreement after open, the pre-authorization will be processed when a new credit card is captured. This means that, for Rentals, if you have a Rental pre-authorization set up, after you capture a card, the pre-authorization is already processed and you cannot edit the amount; the button is not displayed.
Delivery and Collection
Delivery and Collection brings your location to your customers' driveways. See "Delivery and Collection: an Overview" for setup requirements and more information about how it works on the web.
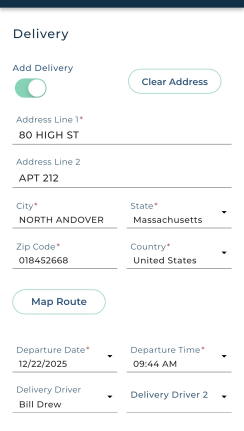
- Mark an agreement for Delivery and/or Collection. Toggle Add Delivery
 and/or Add Collection .
- Manage addresses and times, map the route, and more, depending on your integration. See "Delivery and Collection (Mobile App)".
Insurance Verification Integration
Insurance verification integration is sold separately. Contact your TSD Sales Representative at sales@tsdweb.com for more information.
Insurance Verification automates your process of capturing and/or verifying a customer's automobile insurance policy.
Note: For setup requirements and complete details on this integration, see "Insurance Verification Integration". This section covers only the mobile-specific actions:
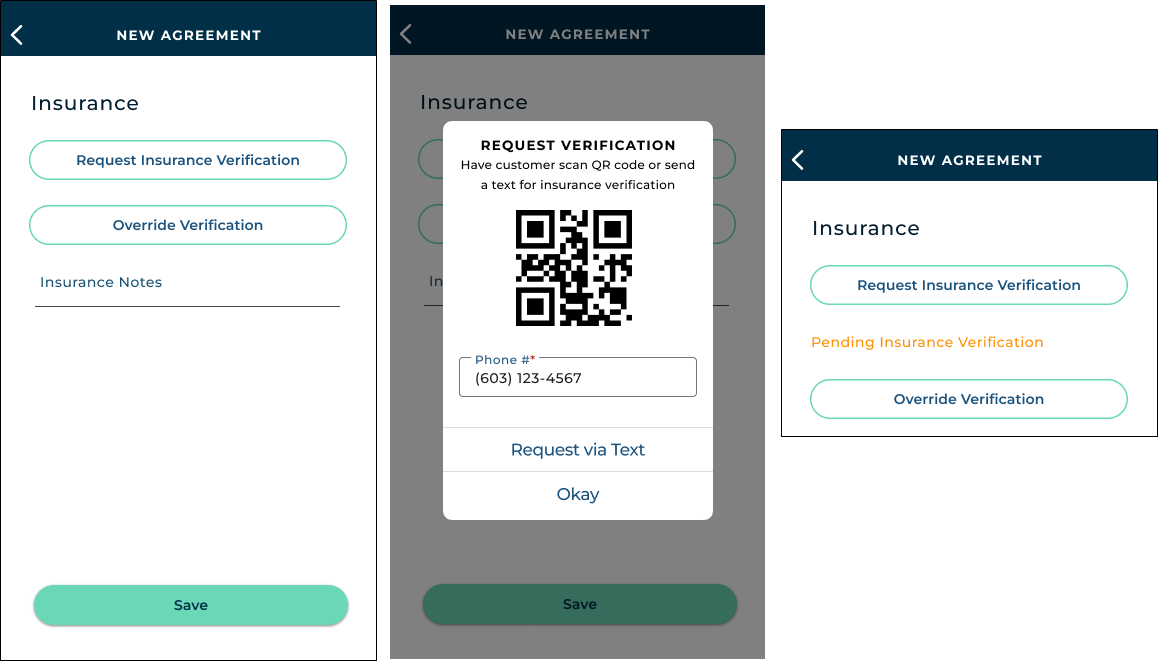
- Request insurance verification from the customer. This may be required on new agreements, based on your settings. In the Insurance section of the agreement, tap , then choose to have the customer scan a QR Code on your screen to access the Insurance dialog, or text the QR code to the customer.
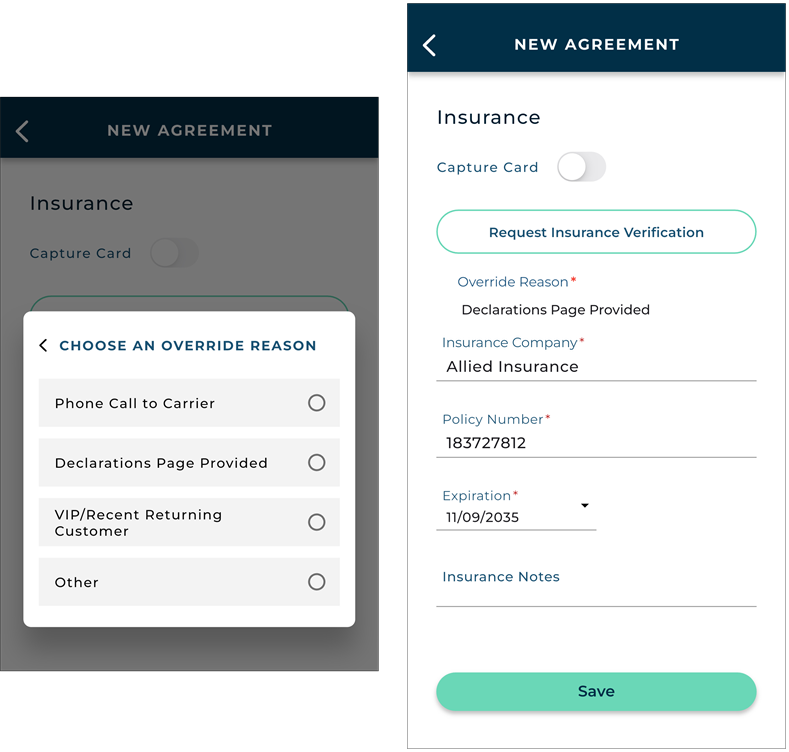
- Override the insurance verification requirement, if applicable. If insurance verification is required on your agreements, employees with the Allow Override Insurance Verification permission have an button to bypass this requirement. This makes the insurance fields available to fill in, and displays your Override Reason.
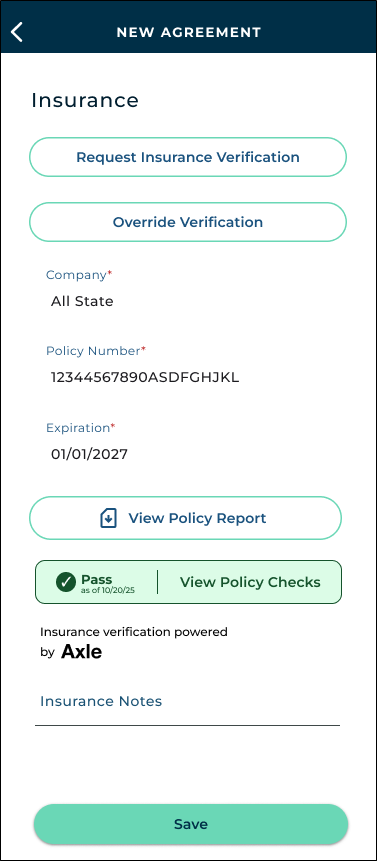
- View insurance policy details. After a policy is connected, the agreement displays the following:
- Insurance fields filled in
- The provider's verification badge
- Pass / fail status & policy details Axle - tap VIEW POLICY CHECKS
- Policy report Axle - tap
- Insurance declaration page Canopy.
- Insurance card or document photo (if uploaded) - tap to zoom
Hover to view the full-sized image.
Hover to view the full-sized image.
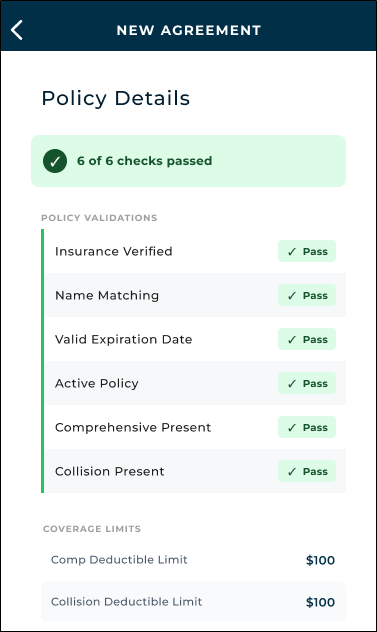
Verified insurance, with Axle, and policy details
Hover to view the full-sized image.
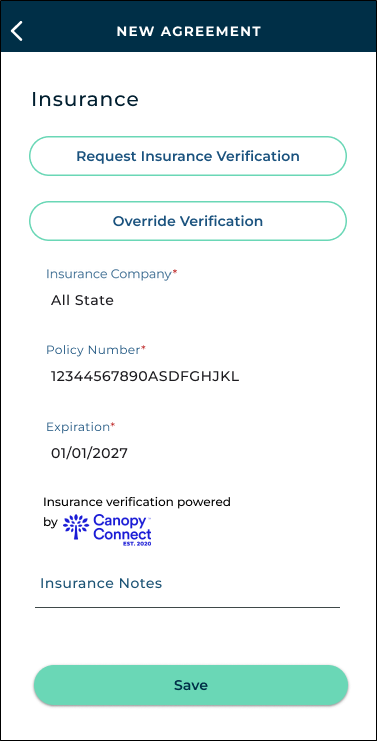
Verified insurance, with Canopy Connect
Hover to view the full-sized image.
Reynolds and Reynolds Integration
HMA SRC's integration with Reynolds and Reynolds facilitates real-time communication between your Reynolds Dealer Management System (DMS) and HMA SRC. See "Reynolds and Reynolds Integration" for setup requirements and more information about how it works on the web.
- Open agreements from appointments sent from ERA-IGNITE. Appointments contain the RCI Appointment Number, Repair Order Status / RO Status, and the Source of Origin is set to 'Reynolds'.
- Add ROs to agreements. Add repair orders (ROs) sent from ERA-IGNITE to agreements, as long as they are not already associated with an appointment or agreement. Read more:
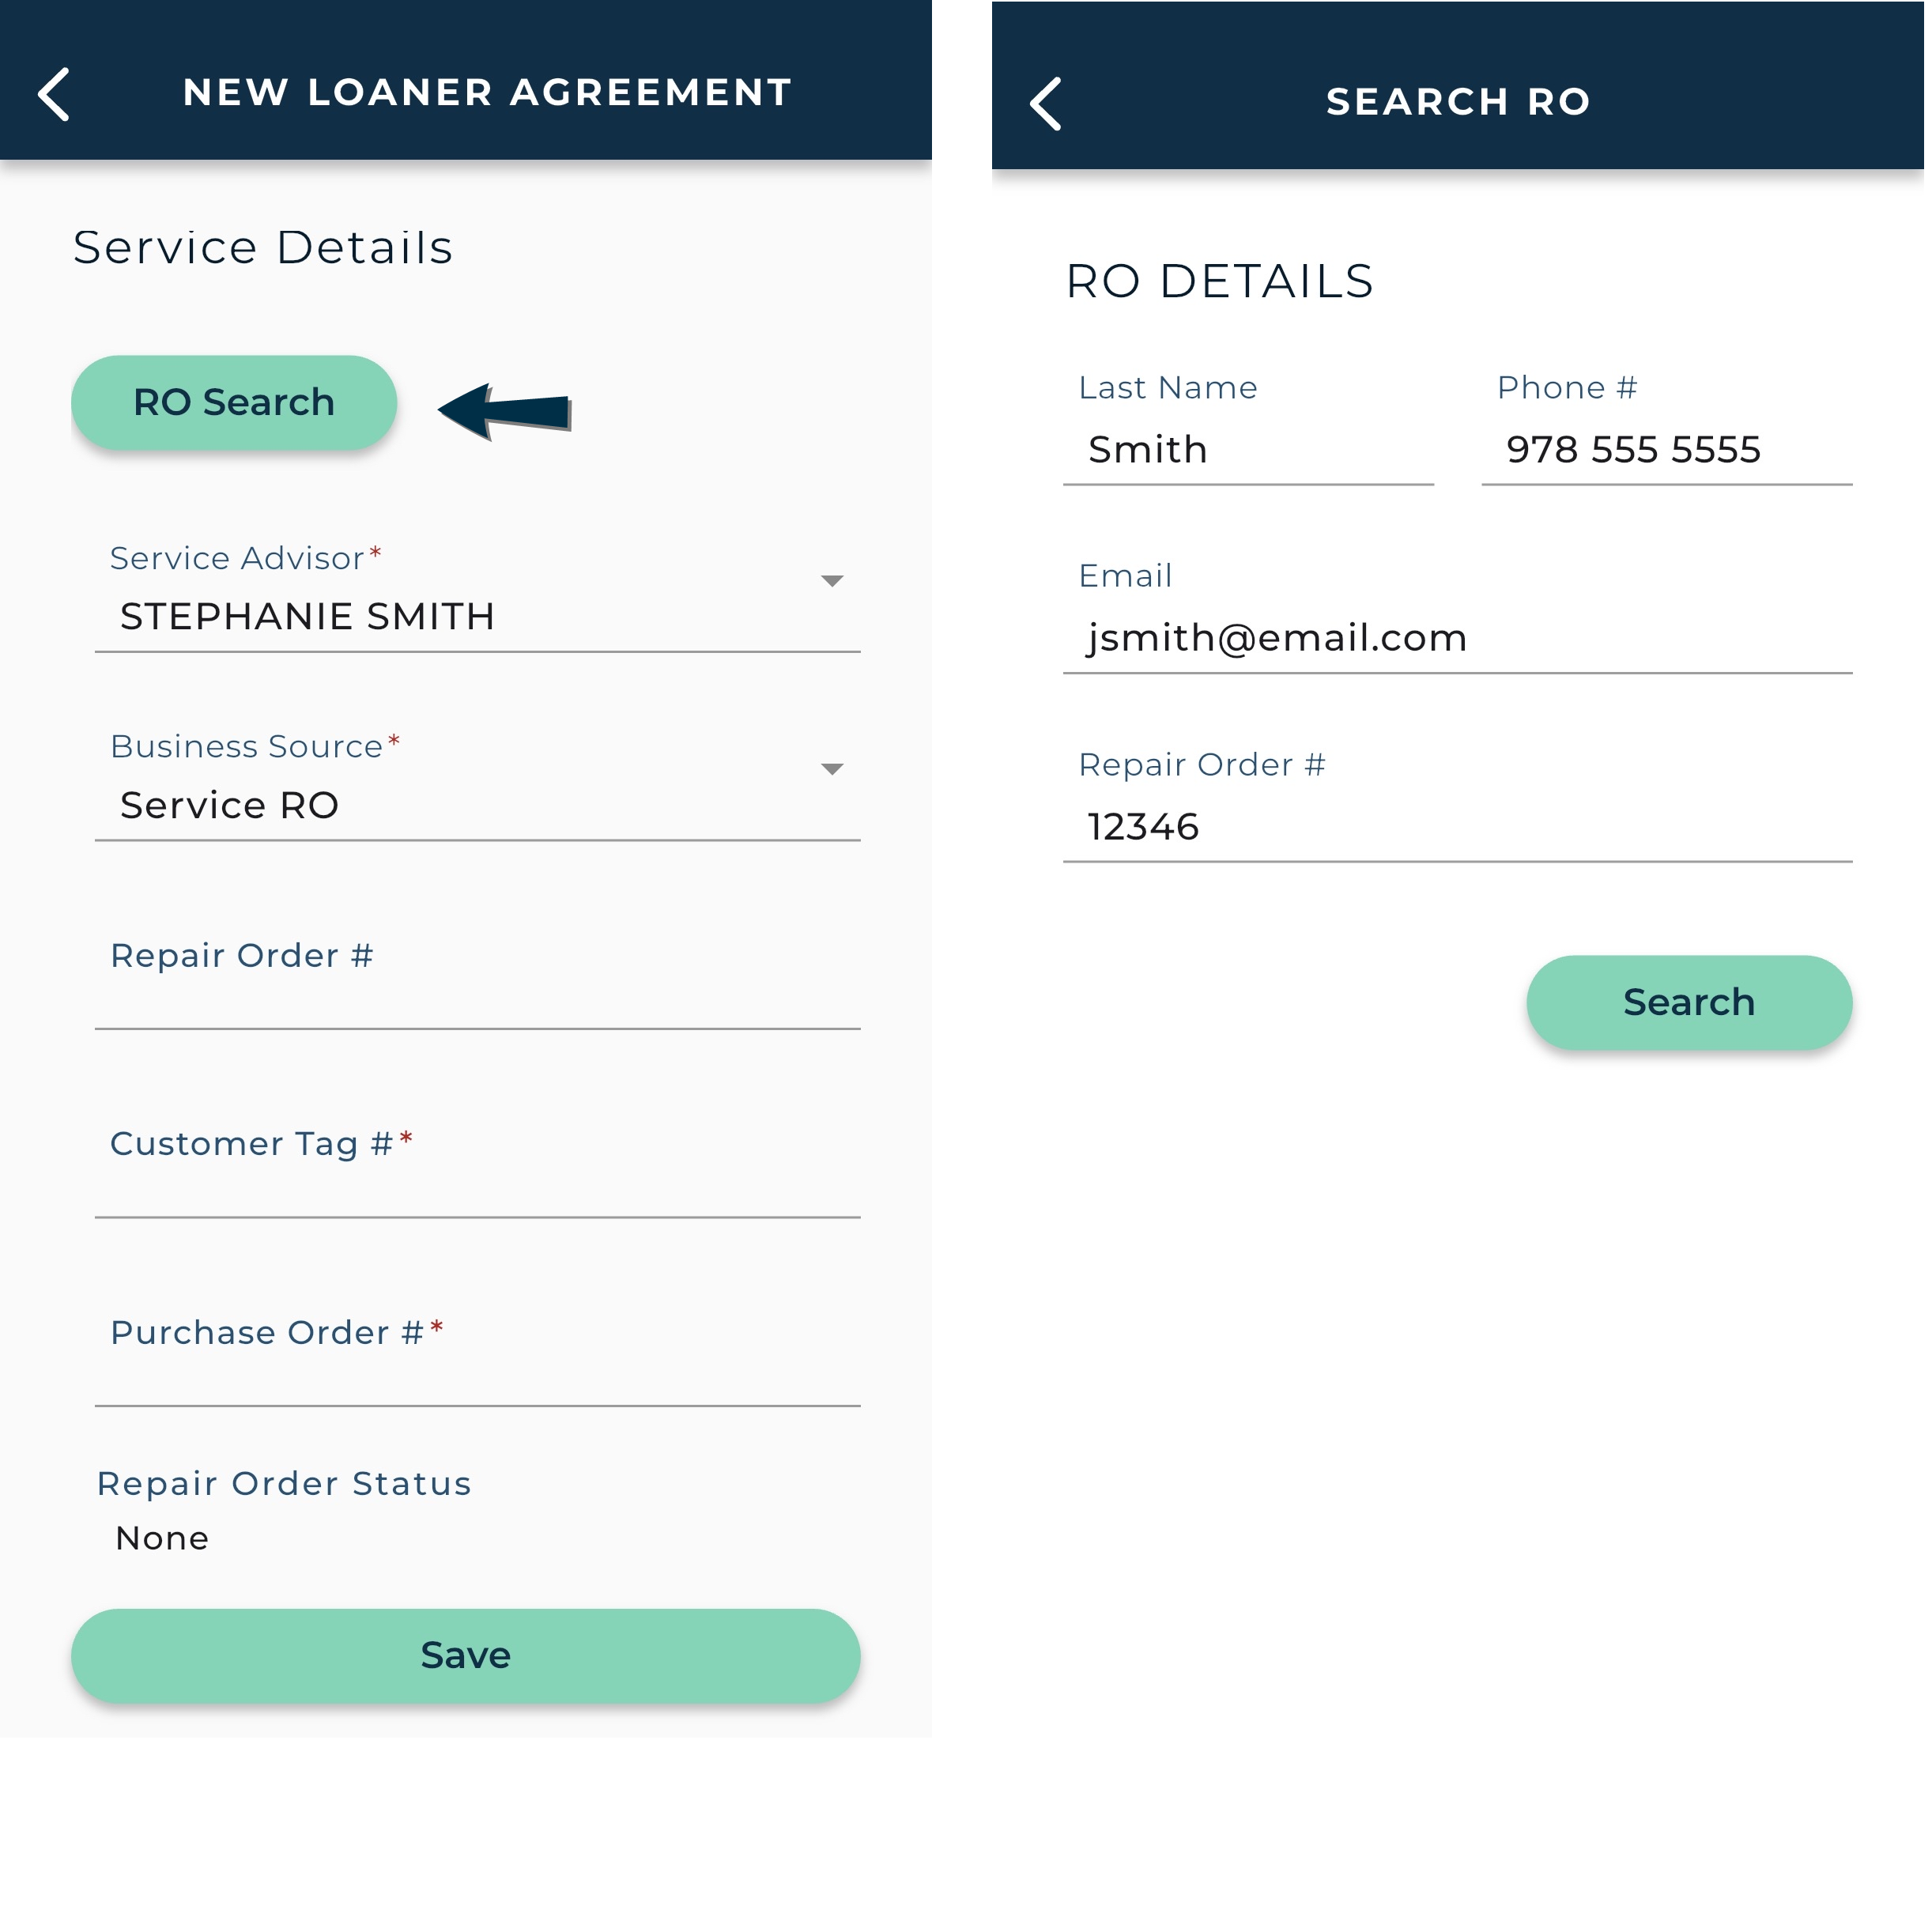
Appointments From Web Schedulers
If your location is integrated with a web scheduler or third party that sends appointments to HMA SRC, those appointments are available in the mobile app.
- Identify appointment sources. Appointments show the Origin for the booking, if different than an appointment directly created in HMA SRC.
- Open agreements from appointments. Access appointments using the Today's Appointments card on the Home screen.
Open Pend an Agreement
The Pend Agreement function is only available based on the Enable Open Pending Agreements management setting.
"Open Pend" an agreement to save it with a Unit Pending status if you want to complete most of the agreement and assign a unit later (e.g., if it is unavailable now).
- Fill in all required information on the agreement, except for assigning a unit (the Checkout Unit section of the Add Unit stepper).
- Tap at the bottom of the screen, available when all required information is completed (except for unit assignment).
- The agreement is saved with a status of Unit Pending. You are returned to the Home screen.
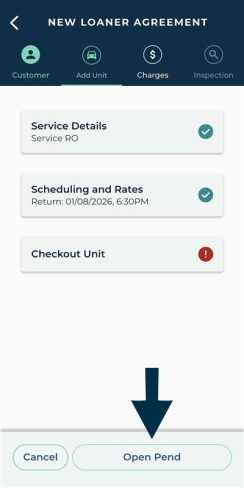
When it's time to assign the unit, you can search for this agreement using the Open Pending card on the Dashboard, assign the unit, and complete the open process.
© 2026 TSD Rental, LLC